Are your house plants root bound?
I often said I don’t do well with houseplants because they don’t grab me and say: “Water. (cough, cough) We need water. Please.” Lol. Alas, that is why they are so easy to have. But are they? Occasionally, plants become root bound and they will tell you they are not happy. Brown leaves, watering that just goes straight out the pot, lack of vibrancy are signs your plants need some more soil. Are your house plants root bound? If they are showing you these signs, perhaps they are.
If your house plants are root bound and need to be repotted here’s some tips you can follow. If you haven’t repotted plants before it can be quite the adventure. It takes a little practice but it’s not that difficult. Just knowing when, why, and how to repot houseplants will help you be successful. Here are some instructions but if you run into trouble, we at Naturescape are usually just a phone call away. (860) 742-0326
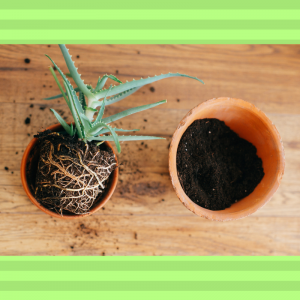
WHEN If you wait until you see the roots coming out of the bottom of the pot that’s like the red engine light in your car. When you see that you need to stop everything and do it now! Stunted growth, as well as the other signs mentioned earlier, are when your plant has become pot bound. This can be checked by carefully removing the pot from the container and examining the roots. If they are coiled around the base of the soil and/or coming out the bottom, the time has come to repot. Typically, we do this in late winter, early spring. We like to do ours in March before it’s gotten warm enough to work outside.

WHY
Plants that stay in the same pot for extended amounts of time can accumulate salt and mineral residue from water that will build to harmful levels in the potting mix. Plants need to be transferred to a larger pot so that their roots can have room for growth. Plants that stay in the same pot will also need more frequent watering because their roots are packed in so tightly. Root bound plants have no soil to retain water so if they don’t drink during the time you water they will be thirsty when you walk away.

HOW
Step 1. Water the plant 4 days before you plan to repot. Repotting plants can be a very messy job so if the weather is warm enough, prepare a spot outside to work.
Step 2. Push the outside of the plastic pot to squeeze the root ball on the inside. Place your fingers over the soil and around the base of the plant. Push on the bottom of the pot and it should pop out. If your plant is in a hard container you’ll want to prep the edge of the soil with a butter knife or flat tool. Try to push the soil around to loosen it from the bottom. Try not to pry it out as this can damage the plant and you could end of repotting a dead plant.
Step 3. Cut a couple slits up the root base to encourage new growth and trim off any dead or wilty looking roots. Do not leave roots that are flimsy or rotted looking. It’s better to take off more than it is to leave diseased root.
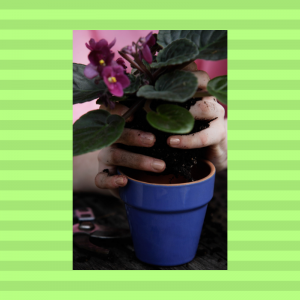
Step 4: Put your new high-quality potting soil into the new pot. Be sure to pack it well around the pot’s drainage hole. Keep the level of soil to the same level as the old pot. Water and add more soil if needed after watering. Be sure to use a saucer under your pot to contain drips.
Step 4. Treat the repotted plant well for the first week because post repotting is a vulnerable time. Be sure to abide by the plant’s light and water requirements. If it is wilting, it might be stressed from being moved from its original pot. Most plants will thrive after repotting and you’ll realize why you enjoyed having them in the first place!

